
Ingredients needed for a crack-free cheesecake
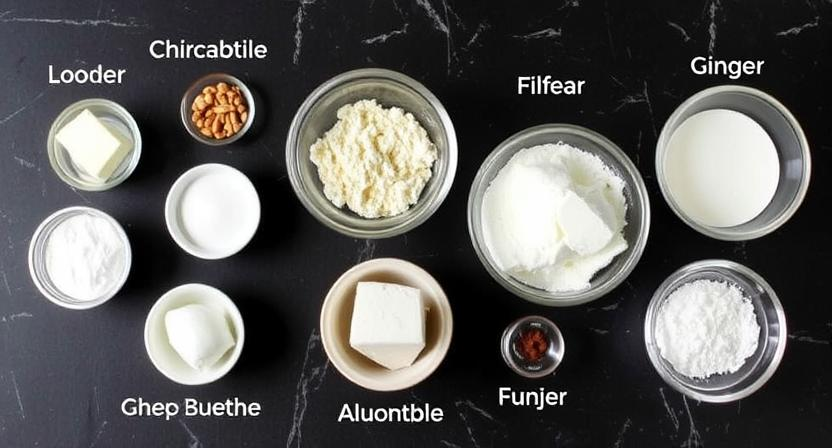
For a perfectly smooth and crack-free cheesecake, it is essential to start with high-quality ingredients. Begin with fresh, room temperature cream cheese that is softened to ensure a smooth and creamy texture in your cheesecake batter. Additionally, using fresh eggs at room temperature helps with even mixing and a uniform bake.
Next, make sure to use a high-quality sour cream to add a subtle tanginess and richness to your cheesecake. Choosing a premium vanilla extract will enhance the flavor of your dessert, while using fresh lemon zest can provide a hint of brightness. Lastly, be sure to use granulated sugar and fine salt to balance the flavors in your cheesecake. Preparing your ingredients thoughtfully will set the stage for a crack-free and delicious dessert that will impress your guests.
• Start with fresh, room temperature cream cheese
• Use fresh eggs at room temperature for even mixing
• Choose high-quality sour cream for tanginess and richness
• Opt for premium vanilla extract to enhance flavor
• Add fresh lemon zest for a hint of brightness
• Use granulated sugar and fine salt to balance flavors
Selecting the right cream cheese for your cheesecake
When choosing cream cheese for your cheesecake, opt for full-fat cream cheese for the best results. The richness of full-fat cream cheese contributes to the smooth and creamy texture of your cheesecake, ensuring a decadent final product. Reduced-fat or fat-free cream cheese may result in a less creamy and slightly firmer cheesecake, so it’s worth investing in the full-fat option.
Another consideration when selecting cream cheese is to use a high-quality brand that is known for its rich flavor and smooth consistency. Cheesecake heavily relies on the taste and texture of cream cheese, so choosing a reputable brand will likely yield a tastier and more luxurious cheesecake. Look for cream cheese that is specifically labeled as “brick-style” or “full-fat” for the best outcome in your cheesecake baking endeavors.
• Opt for full-fat cream cheese for the best results
• Reduced-fat or fat-free cream cheese may result in a less creamy cheesecake
• Use a high-quality brand known for rich flavor and smooth consistency
• Look for cream cheese labeled as “brick-style” or “full-fat”
Tips for using room temperature ingredients
To ensure a smooth and creamy cheesecake batter, it is essential to use ingredients that are at room temperature. When cream cheese, eggs, and other dairy products are too cold, they can cause the batter to become lumpy and unevenly mixed. To bring these ingredients to room temperature, simply leave them out on the counter for about 30 minutes before starting your recipe. For a quicker method, place the sealed packages of cream cheese or eggs in a bowl of lukewarm water for 10-15 minutes, making sure not to let any water seep into the packaging.
Room temperature ingredients blend together more easily, creating a silky texture in your cheesecake. Cold ingredients can lead to overmixing, resulting in a dense and potentially cracked final product. By allowing your ingredients to come to room temperature before mixing, you will achieve a perfectly smooth and creamy cheesecake that is sure to impress your family and friends.
• Allow cream cheese, eggs, and other dairy products to sit out on the counter for about 30 minutes before using
• For a quicker method, place sealed packages in a bowl of lukewarm water for 10-15 minutes
• Room temperature ingredients blend together more easily, creating a silky texture in your cheesecake
• Cold ingredients can lead to overmixing and result in a dense and potentially cracked final product
• Achieve a perfectly smooth and creamy cheesecake by using room temperature ingredients
The importance of properly greasing the pan
Properly greasing the pan is a crucial step in ensuring a flawless cheesecake comes out after baking. Without a well-greased pan, the cheesecake may stick to the sides or bottom, leading to an uneven appearance and making it difficult to remove the dessert intact. This can be a frustrating experience after carefully preparing the batter and waiting for the cheesecake to bake to perfection.
To avoid this issue, take the time to thoroughly grease the entire surface of the pan, including the corners and sides. Using butter or cooking spray helps create a non-stick barrier that allows the cheesecake to release easily once it’s done baking. Additionally, using parchment paper or a buttered and floured base can further aid in the seamless removal of the cheesecake from the pan, preserving its shape and presentation.
• Properly greasing the pan is essential for a flawless cheesecake outcome
• Without proper greasing, the cheesecake may stick to the sides or bottom of the pan
• Thoroughly grease the entire surface of the pan, including corners and sides
• Using butter or cooking spray creates a non-stick barrier for easy release after baking
• Consider using parchment paper or a buttered and floured base for seamless removal
Mixing the cheesecake batter without overmixing
Mixing the cheesecake batter without overmixing is crucial to achieving a smooth and creamy texture in your final dessert. Overmixing can incorporate too much air into the batter, leading to a puffed up and airy cheesecake rather than the dense and rich consistency desired. When combining the cream cheese, eggs, sugar, and other ingredients, mix just until everything is evenly incorporated.
Remember to scrape down the sides of the bowl periodically with a spatula to ensure that all the ingredients are properly mixed together. Be gentle and avoid using high speeds on your mixer to prevent overmixing the batter. The goal is to have a well-blended mixture without introducing excess air, which can result in cracks on the surface of your baked cheesecake.
• Be gentle when mixing the cheesecake batter
• Mix just until all ingredients are evenly incorporated
• Scrape down the sides of the bowl periodically with a spatula
• Avoid using high speeds on your mixer to prevent overmixing
• Aim for a well-blended mixture without excess air
Avoiding air bubbles in the batter

When mixing the cheesecake batter, it is important to do so gently to avoid incorporating too much air into the mixture. Overmixing can lead to the formation of air bubbles, which may cause the cheesecake to crack during baking. To prevent this, use a spatula to fold the ingredients together rather than vigorously stirring them.
Another tip to avoid air bubbles in the batter is to make sure that all ingredients are at room temperature before mixing. Cold ingredients can lead to a thicker batter that requires more mixing, increasing the likelihood of air being trapped in the mixture. By allowing all the ingredients to come to room temperature beforehand, you can achieve a smoother batter with minimal air bubbles for a perfectly creamy cheesecake.
• Mix the cheesecake batter gently with a spatula to avoid incorporating too much air
• Fold the ingredients together instead of vigorously stirring them
• Ensure all ingredients are at room temperature before mixing to prevent air bubbles
• Cold ingredients can lead to a thicker batter that requires more mixing, increasing the likelihood of air being trapped in the mixture
The ideal baking temperature for a crack-free cheesecake
To achieve a crack-free cheesecake, the ideal baking temperature is crucial. A moderate and consistent temperature is key in ensuring that the cheesecake bakes evenly without developing unsightly cracks on the surface. Most recipes recommend baking cheesecakes at around 325°F (160°C) for a gentle and slow cooking process that helps prevent sudden changes in temperature that can lead to cracking.
Maintaining a precise baking temperature is essential for a smooth and creamy cheesecake texture. Baking at too high a temperature can cause the outer edges of the cheesecake to set and firm up quickly, while the center remains undercooked, resulting in cracks as the cheesecake cools. Conversely, baking at too low a temperature can lead to a soft and gooey texture, which may also contribute to cracking once the cheesecake is removed from the oven. By baking your cheesecake at the ideal temperature, you can minimize the risk of cracks and ensure a perfectly baked dessert.
• To achieve a crack-free cheesecake, bake at around 325°F (160°C)
• A moderate and consistent temperature is key for even baking
• Baking at too high or too low temperatures can lead to cracking
• Maintaining a precise baking temperature ensures a smooth and creamy texture
• Ideal baking temperature helps prevent sudden changes that cause cracks
Using a water bath to regulate temperature
To prevent the cheesecake from cracking during baking, a water bath is a highly effective method that helps regulate the temperature and ensures gentle and even heat distribution. All you need is a larger baking pan filled with hot water that surrounds the springform pan holding the cheesecake. This water bath technique helps insulate the batter from direct heat, reducing the risk of overcooking or uneven baking which can lead to unsightly cracks on the surface of the cheesecake.
By using a water bath, the moisture in the oven increases, creating a steamy environment that prevents the cheesecake from drying out and cracking. This gentle baking method also helps the cheesecake bake more evenly, resulting in a smooth and creamy texture throughout. Remember to wrap the bottom of the springform pan holding the cheesecake with foil to prevent any water from seeping into the batter during baking.
• A water bath is a highly effective method to prevent cheesecake from cracking during baking
• The larger baking pan filled with hot water surrounds the springform pan holding the cheesecake
• Water bath technique helps insulate the batter from direct heat, reducing risk of overcooking or uneven baking
• Moisture in oven increases with water bath, creating a steamy environment that prevents cheesecake from drying out and cracking
• Gentle baking method helps bake cheesecake more evenly, resulting in smooth and creamy texture throughout
• Remember to wrap bottom of springform pan with foil to prevent water seepage into batter during baking
Preventing sudden temperature changes
To prevent sudden temperature changes when making a cheesecake, it is crucial to allow ingredients to come to room temperature before mixing them together. Mixing cold ingredients straight from the fridge with room temperature ones can cause the batter to be uneven in temperature, leading to potential cracking during baking. By ensuring that all ingredients are at the same temperature before mixing, you can maintain a more consistent batter temperature throughout the baking process.
Additionally, when removing the cheesecake from the oven, avoid placing it in a drafty or significantly colder environment. Rapid changes in temperature can shock the delicate structure of the cheesecake, causing it to crack. It is best to let the cheesecake cool gradually in a still environment before transferring it to the refrigerator. By taking these precautions to prevent sudden temperature changes, you can increase the chances of a perfectly smooth and crack-free cheesecake.
• Allow ingredients to come to room temperature before mixing
• Mixing cold and room temperature ingredients can cause uneven batter temperature
• Maintain consistent batter temperature throughout baking process
• Avoid placing cheesecake in drafty or significantly colder environment after baking
• Rapid changes in temperature can shock the structure of the cheesecake, causing cracks
• Let the cheesecake cool gradually in a still environment before refrigerating
Cooling the cheesecake gradually after baking
After baking the cheesecake, it is crucial to allow it to cool gradually. Sudden temperature changes can cause cracks to form on the surface of the cheesecake. To avoid this, turn off the oven and crack the door open slightly, letting the cheesecake cool inside the warm oven for about an hour. This gradual cooling process helps to prevent drastic shifts in temperature that could lead to cracks.
Once the cheesecake has cooled in the oven, carefully remove it and let it cool completely on a wire rack at room temperature. Avoid placing the hot cheesecake directly in the refrigerator as this can also cause cracks to form. Letting the cheesecake cool gently and naturally will help it to set properly and maintain its creamy texture. Remember to refrigerate the cheesecake only after it has completely cooled to room temperature.
• Turn off the oven and crack the door open slightly after baking
• Let the cheesecake cool inside the warm oven for about an hour
• Avoid sudden temperature changes to prevent cracks on the surface
• Carefully remove the cheesecake from the oven after cooling
• Let it cool completely on a wire rack at room temperature
• Avoid placing hot cheesecake directly in refrigerator to prevent cracks
Remember, allowing your cheesecake to cool gradually and naturally will help it set properly and maintain its creamy texture. Be patient and follow these steps to ensure a perfectly smooth and delicious dessert every time.
Refrigerating the cheesecake before serving
Once the cheesecake has finished baking and is removed from the oven, it is essential to allow it to cool at room temperature before transferring it to the refrigerator. This gradual cooling process is crucial for the cheesecake to set properly without forming cracks on the surface. Placing a hot cheesecake directly into the refrigerator can lead to temperature shock, causing cracks to develop as the cheesecake cools too quickly.
Refrigerating the cheesecake for at least 4 hours, or ideally overnight, allows the flavors to meld and the texture to firm up, resulting in a decadent and creamy dessert. By chilling the cheesecake, it maintains its shape and richness, making it easier to slice and serve. The refrigerator also helps intensify the flavors, enhancing the overall taste experience of the cheesecake when it is ready to be enjoyed.
• Allowing the cheesecake to cool at room temperature before refrigerating is crucial for proper setting
• Gradual cooling prevents cracks from forming on the surface of the cheesecake
• Refrigerate the cheesecake for at least 4 hours, preferably overnight, for best results
• Chilling helps flavors meld and texture firm up, resulting in a decadent dessert
• The refrigerator maintains shape and richness of the cheesecake, making it easier to slice and serve
• Intensified flavors enhance overall taste experience when ready to be enjoyed
Adding a sour cream or yogurt topping
For an extra burst of flavor and creaminess, consider topping your cheesecake with a decadent layer of sour cream or yogurt. Once your cheesecake has cooled and set in the refrigerator, carefully spread a smooth and even layer of sour cream or yogurt over the top. This not only adds a tangy contrast to the richness of the cheesecake but also provides a beautiful finishing touch that enhances the overall presentation.
To infuse even more flavor into your topping, you can sweeten the sour cream or yogurt with a touch of sugar or honey, and perhaps a hint of vanilla extract or lemon zest for added depth. Allow the topping to set in the refrigerator along with the cheesecake before serving. This simple yet elegant addition can elevate your cheesecake to a whole new level of deliciousness and impress your guests with its sophisticated taste and appearance.
• To add a decorative element, consider swirling the sour cream or yogurt topping with a knife to create a marbled effect on the surface of the cheesecake.
• For an extra touch of indulgence, sprinkle some fresh berries or grated chocolate over the top of the sour cream or yogurt topping before serving.
• If you prefer a thicker and richer topping, opt for Greek yogurt instead of regular yogurt for a more luxurious finish to your cheesecake.
• Experiment with different flavor combinations by adding crushed cookies, chopped nuts, or caramel sauce to your sour cream or yogurt topping for a unique twist on traditional cheesecake toppings.
Using a springform pan for easy removal
When it comes to baking a cheesecake, using a springform pan is essential for easy removal. The springform pan features a removable bottom and a latch on the side that allows the pan to expand, making it simple to release the delicate cheesecake without damaging its smooth surface. This type of pan is particularly useful for desserts like cheesecakes that can be challenging to remove intact from a regular cake pan.
To use a springform pan for your cheesecake, start by greasing the bottom and sides of the pan to prevent sticking. Once your cheesecake is baked and has cooled to room temperature, unlatch the side of the pan and carefully lift it away from the cheesecake. The removable bottom can then be slid out from underneath the cake, leaving you with a perfectly formed and intact cheesecake ready for slicing and serving.
• Using a springform pan is essential for easy removal of delicate desserts like cheesecakes
• The removable bottom and latch on the side allow for simple release without damaging the dessert’s surface
• Grease the pan before baking to prevent sticking
• Once baked and cooled, unlatch the side of the pan and carefully lift it away from the dessert
• Slide out the removable bottom to reveal a perfectly formed dessert ready for serving.
Avoiding overbaking the cheesecake
To avoid overbaking your cheesecake, it is crucial to keep a close eye on the baking time recommended in the recipe. Overbaking can result in a dry and cracked cheesecake, so it’s important to follow the instructions carefully. Start checking for doneness about 10 minutes before the suggested baking time by gently shaking the pan. The center of the cheesecake should still have a slight jiggle when it’s ready to be removed from the oven. Remember that the cheesecake will continue to set as it cools, so it’s better to slightly underbake it than to overdo it.
Once you have determined that the cheesecake is ready, resist the temptation to leave it in the oven for longer than necessary. Remove the cheesecake promptly from the oven to prevent it from overbaking. The residual heat from the pan and surrounding area will continue cooking the dessert even after it’s out of the oven, so it’s essential to act swiftly. By following these steps, you can ensure a perfectly baked and creamy cheesecake that is free from unsightly cracks or dry texture.
• Keep a close eye on the baking time recommended in the recipe
• Start checking for doneness about 10 minutes before suggested baking time
• Gently shake the pan to see if the center of the cheesecake has a slight jiggle
• Remember that cheesecake will continue to set as it cools
• Resist temptation to leave cheesecake in oven longer than necessary
• Remove promptly from oven to prevent overbaking
• Residual heat will continue cooking dessert even after it’s out of oven.
Checking for doneness by gently shaking the pan
When checking for doneness by gently shaking the pan, observe the center of the cheesecake for a slight jiggle instead of a liquidy movement. The edges should be set while the middle remains slightly wobbly. This jiggle indicates that the cheesecake is perfectly baked and will set further as it cools.
If the cheesecake appears too liquidy and jiggles significantly when shaken, it needs more time in the oven. On the other hand, if the entire surface of the cheesecake moves in large waves, it has likely been overbaked. Keeping an eye on these subtle cues while gently shaking the pan will help you achieve a flawlessly baked cheesecake every time.
• When checking for doneness by gently shaking the pan, look for a slight jiggle in the center
• The edges should be set while the middle remains slightly wobbly
• This jiggle indicates that the cheesecake is perfectly baked and will set further as it cools
• If the cheesecake appears too liquidy and jiggles significantly when shaken, it needs more time in the oven
• If the entire surface of the cheesecake moves in large waves, it has likely been overbaked
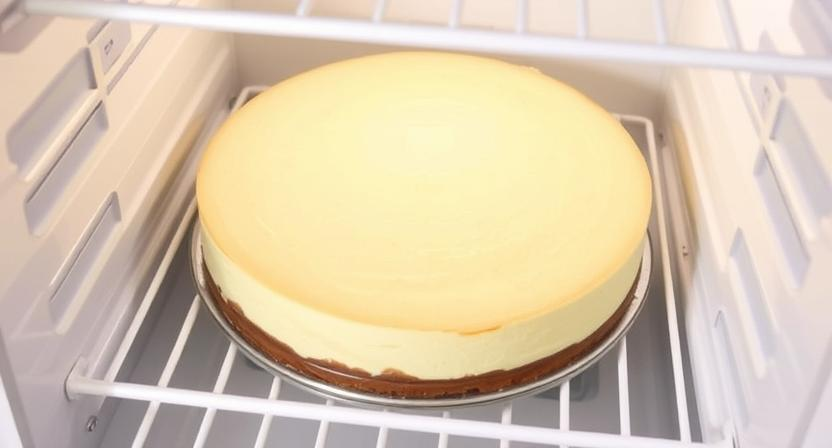
Allowing the cheesecake to set in the refrigerator

After baking your cheesecake to perfection, it’s crucial to allow it to set in the refrigerator before slicing into it. The chilling process helps the cheesecake firm up and develop a smooth, creamy texture. This step is essential for achieving that signature dense consistency that makes cheesecake so delicious.
As the cheesecake chills in the refrigerator, the flavors meld together and intensify, resulting in a more flavorful dessert. Additionally, the chilling process allows the cheesecake to fully set, which makes it easier to slice into neat portions without the risk of it falling apart. Aim to refrigerate your cheesecake for at least 4 hours, but overnight chilling is even better to ensure that your dessert is delightfully firm and ready to be enjoyed.
• Allowing the cheesecake to set in the refrigerator is crucial for achieving a smooth, creamy texture
• Chilling helps the flavors of the cheesecake meld together and intensify
• Refrigerating for at least 4 hours is recommended, but overnight chilling is even better
• The chilling process allows the cheesecake to fully set, making it easier to slice into neat portions without falling apart
Decorating the cheesecake with fresh fruit or sauce
When it comes to adding the final touches to your cheesecake, decorating with fresh fruit or a flavorful sauce can elevate its presentation and taste. Fresh berries like strawberries, blueberries, or raspberries not only add a burst of color but also a refreshing contrast to the creamy texture of the cheesecake. You can arrange the fruit in a neat pattern on top of the cheesecake or create a mixed fruit medley for a vibrant display. Alternatively, a drizzle of homemade raspberry sauce or a dollop of mango puree can complement the rich flavors of the cheesecake, adding a delightful sweetness and tanginess with every bite. The key is to be creative and playful with your choice of fruits and sauces to make your cheesecake visually appealing and even more delicious.
• Decorate with fresh berries like strawberries, blueberries, or raspberries for a burst of color
• Arrange fruit in a neat pattern on top of the cheesecake or create a mixed fruit medley for a vibrant display
• Drizzle homemade raspberry sauce or dollop mango puree to complement the rich flavors of the cheesecake
• Be creative and playful with your choice of fruits and sauces to make your cheesecake visually appealing
Slicing the cheesecake with a warm knife
To achieve clean and neat slices when serving your homemade cheesecake, it is important to use a warm knife for cutting. Before slicing the cheesecake, run a sharp knife under hot water and then dry it with a towel. The warmth of the knife helps to glide through the creamy texture of the cheesecake without causing it to stick or tear.
By using a warm knife, you not only ensure smooth cuts but also maintain the presentation of the cheesecake. Wiping the knife clean and reheating it after each slice will result in well-defined portions that are visually appealing. This simple technique can make a big difference in the overall look and taste of your cheesecake when it is served to family and friends.
• To achieve clean and neat slices when serving your homemade cheesecake, use a warm knife
• Run a sharp knife under hot water and dry it with a towel before slicing the cheesecake
• The warmth of the knife helps to glide through the creamy texture without causing sticking or tearing
• Using a warm knife ensures smooth cuts and maintains the presentation of the cheesecake
• Wiping the knife clean and reheating it after each slice results in well-defined portions that are visually appealing
Storing leftover cheesecake properly
To ensure the longevity and freshness of your leftover cheesecake, proper storage is paramount. Once the cheesecake has been served and you find yourself with extra slices, it’s crucial to store them in an airtight container or tightly wrapped in plastic wrap. This helps prevent the cheesecake from absorbing any odors or flavors from other items in the refrigerator. Additionally, keeping the cheesecake covered will help maintain its moisture and texture.
When storing leftover cheesecake in the refrigerator, make sure to place it on a level shelf, away from any strong-smelling foods. This will help preserve the delicate flavors of the cheesecake. If you find yourself with a whole cheesecake to store, consider cutting it into individual slices before storing to make it easier to grab a portion when craving strikes. Remember to consume the leftover cheesecake within a few days for the best taste and texture.
• Store leftover cheesecake in an airtight container or tightly wrapped in plastic wrap
• Prevent absorption of odors and flavors from other items in the refrigerator
• Maintain moisture and texture by keeping cheesecake covered
• Place cheesecake on a level shelf away from strong-smelling foods in the refrigerator
• Consider cutting whole cheesecake into individual slices for easier access
• Consume leftover cheesecake within a few days for best taste and texture
Tips for preventing cracks in future cheesecake baking
To prevent cracks in future cheesecake baking, it’s essential to ensure the batter is mixed just enough to combine the ingredients smoothly. Overmixing can introduce too much air into the batter, leading to cracks as the cheesecake bakes. Be gentle when incorporating the ingredients and stop mixing as soon as everything is well blended.
Another key tip is to avoid sudden temperature changes during the baking and cooling process. Drastic shifts in temperature can cause the cheesecake to contract and crack. To prevent this, allow the cheesecake to cool gradually in the oven with the door propped open slightly before transferring it to the countertop. This gradual cooling process helps the cheesecake to set evenly and reduces the likelihood of cracks forming on the surface.
• Mix the batter just enough to combine ingredients smoothly
• Avoid overmixing to prevent introducing too much air
• Stop mixing as soon as everything is well blended
• Prevent sudden temperature changes during baking and cooling
• Allow cheesecake to cool gradually in the oven with door propped open slightly
• Transfer cheesecake to countertop only after it has cooled evenly