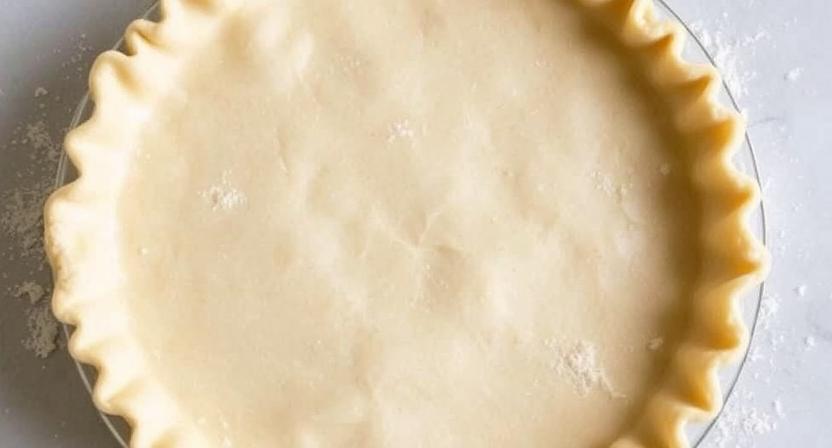
Ingredients for a Flaky Pie Crust
When it comes to baking a perfect flaky pie crust, the ingredients you use play a crucial role in determining the final outcome. For a traditional pie crust, you’ll need basic pantry staples like all-purpose flour, salt, unsalted butter, and ice water. The flour provides structure, while the butter adds flavor and creates those coveted flaky layers as it melts during baking.
It’s important to use cold ingredients when making pie crust to ensure a tender and flaky texture. Cold butter helps create steam pockets in the dough, which, in turn, produce those delightful layers that make a pie crust so delectable. Additionally, using ice water helps keep the butter cold and prevents it from melting too soon, resulting in a crisp and flaky crust.
• All-purpose flour: provides structure to the pie crust
• Salt: enhances flavor and balances sweetness
• Unsalted butter: adds richness and creates flaky layers when melted
• Ice water: keeps butter cold and helps maintain a tender texture
• Cold ingredients are essential for creating steam pockets in the dough, which produce flaky layers.
Choosing the Right Flour for Pie Crust
One of the key factors in achieving a flaky and tender crust for your pies is choosing the right flour. When it comes to pie crusts, all-purpose flour is a popular choice due to its moderate protein content. This protein content helps create structure in the crust, but not too much to make it tough.
Another option to consider is pastry flour, which has a lower protein content than all-purpose flour. Pastry flour is a good choice for those looking for a more delicate and tender crust, perfect for desserts like fruit pies. Experimenting with different types of flours can help you find the perfect balance of tenderness and structure for your ideal pie crust.
• All-purpose flour is a popular choice for pie crusts due to its moderate protein content
• Pastry flour has a lower protein content and creates a delicate and tender crust
• Experimenting with different types of flours can help find the perfect balance for your ideal pie crust
The Importance of Cold Ingredients
Using cold ingredients is crucial when making a flaky pie crust. Cold butter and ice water help maintain the proper texture of the dough by preventing the fat from melting too quickly. When the butter melts in the oven, it creates steam pockets that give the crust its flakiness. If the butter is too warm, it will not be able to create those desired pockets, resulting in a dense and tough crust.
In addition to cold butter, using cold water or even better, ice water, is essential in pie crust recipes. Ice water helps keep the butter in the dough from softening too quickly, ensuring that the crust remains tender and flaky when baked. By incorporating cold ingredients into your pie crust recipe, you are setting yourself up for success in achieving a delicious and perfectly flaky crust that will impress all your guests.
• Using cold butter and ice water helps maintain the proper texture of the dough
• Prevents the fat from melting too quickly, creating steam pockets for flakiness
• Warm butter results in a dense and tough crust
• Cold water or ice water is essential in pie crust recipes to keep butter from softening too quickly
• Ensures that the crust remains tender and flaky when baked
Tips for Handling Butter in Pie Crust
To ensure a flaky and tender pie crust, proper handling of butter is crucial. Begin by cutting cold butter into small cubes before incorporating it into the flour mixture. Keeping the butter cold is essential to prevent it from melting too quickly and compromising the flakiness of the crust. Additionally, working with chilled butter ensures that it distributes evenly throughout the dough, creating those desirable pockets of fat that lead to a flaky texture.
When incorporating the butter into the flour, use a pastry cutter or your fingertips to break down the butter until it resembles pea-sized crumbs. Be cautious not to overwork the mixture, as the goal is to maintain small chunks of butter throughout the dough to achieve a flaky crust. Once the butter is incorporated, gradually add ice water to bring the dough together. By mastering the art of handling butter in pie crust, you’ll be well on your way to creating the perfect flaky crust for your delicious pies.
• Begin by cutting cold butter into small cubes
• Keep the butter cold to prevent it from melting too quickly
• Work with chilled butter to ensure even distribution throughout the dough
• Use a pastry cutter or fingertips to break down butter into pea-sized crumbs
• Avoid overworking the mixture to maintain small chunks of butter in the dough
• Gradually add ice water to bring the dough together
Why You Should Use Ice Water in Pie Crust
Using ice water in pie crust is a crucial step in ensuring a tender and flaky final product. The cold temperature of the water helps to keep the butter or shortening in the dough from melting too quickly, which is important for creating those desirable layers in a pie crust. When the fat in the dough melts during baking, it creates steam that lifts the layers of flour, resulting in a light and airy texture. Ice water slows down this process, giving you more control over the outcome of your pie crust.
Additionally, using ice water helps to maintain the proper temperature of the dough throughout the mixing process. Keeping the dough cold prevents the fat from becoming overworked, which can lead to a tough and dense crust. By starting with chilled ingredients and using ice water, you set yourself up for success in achieving the ideal texture and consistency in your pie crust.
• Ice water helps to keep the butter or shortening from melting too quickly
• Creates desirable layers in a pie crust
• Melting fat creates steam that lifts layers of flour, resulting in light and airy texture
• Ice water slows down this process for more control over outcome
Using ice water also aids in maintaining the proper temperature of the dough during mixing. This prevents the fat from being overworked, which can result in a tough and dense crust. Starting with chilled ingredients and incorporating ice water into your recipe sets you up for success by ensuring the ideal texture and consistency in your pie crust.
• Maintains proper temperature of dough throughout mixing process
• Prevents fat from becoming overworked
• Sets you up for success in achieving ideal texture and consistency
The Role of Vinegar or Lemon Juice in Pie Crust
Vinegar or lemon juice may seem like unusual ingredients in a pie crust, but they play a crucial role in achieving the desired texture and flavor. These acidic components help tenderize the dough by inhibiting gluten development, resulting in a more tender and flaky crust. Additionally, the slight tanginess they impart can enhance the overall flavor profile of the pie, balancing out the sweetness of the filling.
When incorporating vinegar or lemon juice into your pie crust recipe, it’s essential to do so with care. Too much acidity can adversely affect the structure of the dough, leading to a soggy or crumbly crust. However, when used in the right proportions, these ingredients can elevate your pie crust to new heights, adding complexity and depth to your baked goods.
• Vinegar or lemon juice are crucial in achieving desired texture and flavor in pie crust
• They tenderize the dough by inhibiting gluten development, resulting in a more tender and flaky crust
• The tanginess they impart can enhance the overall flavor profile of the pie, balancing out sweetness
• When incorporating these ingredients, it’s important to do so with care to avoid adverse effects on dough structure
How to Achieve the Perfect Butter-to-Flour Ratio
Achieving the perfect butter-to-flour ratio is essential for a flaky, tender pie crust. Too much butter can result in a greasy texture, while too little can lead to a dry and tough crust. The key is to find the right balance that allows the butter to create pockets of steam during baking, which helps to create layers in the crust.
A common rule of thumb is to use a ratio of 1 part butter to 2 parts flour by weight. This means if you have 8 ounces of flour, you would need 4 ounces of butter. However, some recipes may call for variations in this ratio depending on the desired outcome. Experimenting with different ratios can help you determine the perfect balance for your pie crust that suits your taste preferences.
• Achieving the perfect butter-to-flour ratio is crucial for a flaky pie crust
• Too much butter can result in a greasy texture, while too little can lead to a dry crust
• The right balance allows the butter to create steam pockets during baking
• A common rule of thumb is 1 part butter to 2 parts flour by weight
• Experimenting with ratios can help find the perfect balance for your taste preferences
Methods for Mixing Pie Crust Dough
When it comes to mixing pie crust dough, there are a few approaches you can take. One common method is using a pastry cutter or two forks to cut the butter into the flour until the mixture resembles coarse crumbs. This technique helps create a flaky texture by ensuring small pieces of butter are distributed evenly throughout the dough. Another way to mix pie crust dough is by using a food processor. Simply pulse the flour, salt, and cold butter together until the mixture looks like coarse meal. Then, gradually add ice water until the dough comes together.
Alternatively, you can mix pie crust dough by hand. Start by whisking together the flour and salt in a bowl, then using a box grater to grate cold butter directly into the flour mixture. Gently toss the butter and flour together until the butter is coated, then incorporate ice water a little at a time, using a fork to mix until the dough forms. This method allows for a more hands-on approach, giving you better control over the dough’s consistency and ensuring a tender crust.
• One common method is using a pastry cutter or two forks to cut the butter into the flour until the mixture resembles coarse crumbs.
• Using a food processor by pulsing the flour, salt, and cold butter together until it looks like coarse meal, then gradually adding ice water until the dough comes together.
• Mixing pie crust dough by hand involves whisking together flour and salt, grating cold butter into the mixture, incorporating ice water gradually with a fork until the dough forms.
The Best Way to Chill Pie Crust Dough
After preparing the pie crust dough, chilling is a crucial step to ensure a flaky and tender crust. To achieve optimal results, tightly wrap the dough in plastic wrap, forming it into a disk shape. This helps the dough chill evenly and prevents it from drying out in the refrigerator. Placing the wrapped dough in the fridge for at least an hour allows the butter to solidify and the gluten in the flour to relax, making the dough easier to roll out and work with.
It’s important not to rush the chilling process, as this step is essential for the success of your pie crust. If the dough is not thoroughly chilled, it may become too soft and difficult to handle, leading to a tough and dense crust. By giving the dough ample time to chill, you’re setting the foundation for a beautifully flaky crust that will complement your pie filling perfectly.
• After preparing the pie crust dough, tightly wrap it in plastic wrap
• Form the dough into a disk shape to ensure even chilling
• Place the wrapped dough in the refrigerator for at least an hour
• Allowing time for butter to solidify and gluten to relax makes rolling out easier
Chilling pie crust dough is a crucial step that should not be rushed.
If the dough is not thoroughly chilled, it may become too soft and difficult to handle.
Giving the dough ample time to chill sets the foundation for a beautifully flaky crust that complements your pie filling perfectly.
Rolling Out Pie Crust Dough Properly
To roll out pie crust dough properly, it is crucial to start with chilled dough. This ensures that the butter in the dough remains solid, which is essential for creating a flaky crust. Let the dough sit at room temperature for a few minutes if it feels too hard to roll out initially.
When rolling out the dough, work quickly but carefully to prevent the butter from melting and becoming too soft. Lightly flour your work surface and rolling pin to prevent sticking. Roll the dough from the center outwards, rotating it frequently to maintain an even thickness. Aim for a circle that is slightly larger than your pie dish to allow for overhang and shrinkage during baking.
• Start with chilled dough to keep the butter solid
• Let dough sit at room temperature if too hard initially
• Work quickly but carefully to prevent butter from melting
• Lightly flour work surface and rolling pin to prevent sticking
• Roll dough from center outwards, rotating frequently for even thickness
• Aim for circle slightly larger than pie dish for overhang and shrinkage
Tricks for Transferring Pie Crust to a Pie Dish
When it comes to transferring pie crust to a pie dish, many bakers find this step a bit tricky. An easy and effective way to do this is by gently rolling the dough around your rolling pin and then unrolling it over your pie dish. This technique helps prevent the crust from tearing or stretching too much, ensuring a nice fit in the dish without compromising the structure of the dough.
Another useful trick is to fold the pie crust in half before transferring it to the dish. By doing this, you can easily lift the dough without it breaking apart and then unfold it neatly in the pie dish. This method not only makes the transfer process smoother but also helps in centering the crust and avoiding any uneven edges, resulting in a more professional-looking pie crust.
• Gently roll the dough around a rolling pin for easy transfer
• Folding the pie crust in half before transferring helps prevent breaking
• Unfolding the dough neatly in the pie dish ensures a professional look
How to Crimp Pie Crust Edges
Crimping the edges of your pie crust not only serves a functional purpose by sealing in the delicious filling but also adds a decorative touch to your baked creation. There are various methods to achieve beautifully crimped edges, each bringing its own charm to the finished look of your pie. One classic technique is using your fingers to press the dough firmly against the rim of the pie dish, creating a scalloped pattern that gives a homemade feel to your dessert. Alternatively, you can use a fork to press down on the edges, creating a simple yet effective pattern that ensures a tight seal to prevent the filling from leaking out during baking.
• Another popular method is the fluted edge, which involves using your fingers to create a wave-like pattern around the crust.
• For a more intricate design, try the rope crimping technique by twisting small sections of dough between your fingers to form a twisted rope effect.
• If you want to get creative, experiment with different tools like cookie cutters or even a paring knife to create unique patterns on the edges of your pie crust.
• Remember to chill your pie crust before crimping to ensure that it holds its shape during baking and maintains crisp edges.
Why Blind Baking is Important for Some Pie Recipes
Blind baking is a crucial step in certain pie recipes that require a pre-baked crust before adding the filling. This technique involves partially or fully baking the pie crust before adding the filling, ensuring that the crust retains its integrity and does not become soggy when the filling is added. By baking the crust first, it sets the structure and helps prevent the bottom from becoming overly moist from the filling’s juices, especially in pies with wet fillings like custards or fruits with high water content.
Moreover, blind baking is essential for pies with fillings that require less time to cook than the crust itself. This process ensures that the crust is fully cooked and golden brown before adding the filling, preventing an undercooked or raw bottom crust. By blind baking the crust, you can achieve a crisp and flaky texture that complements the pie’s filling, resulting in a perfectly balanced dessert that is both visually appealing and delicious.
• Blind baking is crucial for certain pie recipes that require a pre-baked crust
• It helps the crust retain its integrity and prevents it from becoming soggy
• Baking the crust first sets the structure and prevents it from getting overly moist from filling juices
• Essential for pies with fillings that require less time to cook than the crust itself
• Ensures the crust is fully cooked and golden brown before adding the filling
Tips for Preventing a Soggy Bottom Crust
To prevent a soggy bottom crust when making pies, one effective tip is to blind bake the crust before adding any filling. Blind baking refers to pre-baking the crust by lining it with parchment paper or foil and then filling it with pie weights or dry beans to keep it from puffing up. This process helps to set the structure of the crust and create a barrier against the moisture from the filling.
Another tip to avoid a soggy bottom crust is to brush the bottom crust with a thin layer of beaten egg white before adding the filling. The egg white creates a seal that helps to protect the dough from absorbing too much liquid from the filling, resulting in a crisp and flaky bottom crust. Additionally, using a thicker filling or incorporating breadcrumbs or ground nuts into the bottom crust can also help absorb excess moisture and prevent sogginess.
• Blind bake the crust before adding filling
• Brush bottom crust with beaten egg white before filling
• Use a thicker filling or incorporate breadcrumbs/ground nuts into bottom crust to absorb excess moisture
How to Bake a Perfectly Flaky Pie Crust
To bake a perfectly flaky pie crust, preheat your oven to the specified temperature in the recipe. Remember that an oven that is too hot can cause the butter in the crust to melt too quickly, resulting in a less flaky texture. Place your pie in the center of the oven to ensure even baking and rotation during the baking process may be necessary for consistent heat distribution.
Additionally, make sure to brush the crust with an egg wash or milk before baking to give it a beautiful golden color and crisp texture. Keep an eye on the pie as it bakes, and if the edges start to brown too quickly, cover them with foil to prevent burning. Let the pie cool completely before slicing to allow the crust to set properly and fully enjoy the flaky texture you worked so hard to achieve.
• Preheat your oven to the specified temperature in the recipe
• Place your pie in the center of the oven for even baking
• Rotate the pie during baking for consistent heat distribution
• Brush crust with egg wash or milk before baking for a golden color and crisp texture
• Cover edges with foil if they brown too quickly to prevent burning
• Allow pie to cool completely before slicing for proper crust setting
Troubleshooting Common Pie Crust Problems
If your pie crust is turning out tough and dense, you may be overworking the dough. Remember to handle the dough as little as possible once the liquid has been added to prevent the development of gluten, which can make the crust tough. Additionally, make sure your ingredients are cold and avoid using warm hands when working with the dough.
On the other hand, if your pie crust is shrinking or slumping during baking, it could be due to inadequate chilling time. Be sure to chill the dough for the recommended amount of time before rolling it out. You can also try letting the rolled-out dough rest in the fridge before baking to help prevent shrinkage.
• If your pie crust is turning out tough and dense, you may be overworking the dough
• Handle the dough as little as possible once the liquid has been added to prevent gluten development
• Make sure ingredients are cold and avoid using warm hands when working with the dough
• If your pie crust is shrinking or slumping during baking, it could be due to inadequate chilling time
• Chill the dough for recommended amount of time before rolling it out
• Let rolled-out dough rest in fridge before baking to help prevent shrinkage
Storing Leftover Pie Crust Dough
If you find yourself with extra pie crust dough after baking your delicious pies, it’s important to store it properly to maintain its freshness and texture. The best way to store leftover pie crust dough is to tightly wrap it in plastic wrap or place it in an airtight container to prevent it from drying out or absorbing any odors from the fridge. Make sure to label the container with the date so you can keep track of how long it has been stored.
When storing pie crust dough, it’s recommended to use it within 2-3 days for optimal results. If you know you won’t be using it within that timeframe, you can also freeze the dough for later use. Simply wrap the dough tightly in plastic wrap, place it in a freezer-safe bag, and store it in the freezer. When you’re ready to use the frozen dough, allow it to thaw in the refrigerator overnight before rolling it out for your next delicious pie creation.
• If you are planning to freeze the pie crust dough, make sure to double wrap it in plastic wrap to prevent freezer burn
• Before using the thawed dough, let it sit at room temperature for about 10-15 minutes to soften slightly
• To ensure a flaky and tender crust, handle the dough as little as possible when rolling it out
• Leftover pie crust dough can also be used for making savory dishes such as quiches or hand pies
Creative Ways to Use Leftover Pie Crust Scraps
One creative way to use leftover pie crust scraps is to make delicious cinnamon sugar pinwheels. Simply roll out the pie crust scraps, brush with melted butter, sprinkle generously with a mixture of cinnamon and sugar, then roll up and slice into rounds. Bake until golden brown and enjoy these sweet treats as a snack or dessert.
Another fun idea for utilizing pie crust scraps is to make mini hand pies. Cut the scraps into small circles or squares, place a spoonful of your favorite pie filling in the center, fold over, and crimp the edges with a fork. Bake until golden and serve these adorable mini pies as a delightful snack or individual dessert. With a little creativity, pie crust scraps can be transformed into delicious treats that are perfect for enjoying on their own or sharing with friends and family.
• Cinnamon sugar pinwheels are a delicious way to use pie crust scraps
• Mini hand pies can be made with leftover pie crust scraps
• Get creative and transform pie crust scraps into tasty treats for snacking or dessert
Variations on Traditional Pie Crust Recipes
For those looking to add an extra layer of flavor or texture to their pie crusts, there are various ways to tweak traditional recipes. One option is to incorporate herbs or spices directly into the crust dough, such as rosemary, thyme, or cinnamon, to complement the filling inside. These subtle additions can elevate the overall taste of the pie and provide a unique twist on a classic dessert.
Another popular variation is to swap out a portion of the flour in the pie crust recipe with alternative flours like whole wheat, rye, or cornmeal. Each of these alternatives imparts a distinct flavor profile and texture to the crust, adding depth and complexity to your pies. Experimenting with different flours can also offer nutritional benefits and cater to various dietary preferences, making pie crusts more versatile and inclusive.
• Incorporate herbs or spices directly into the crust dough, such as rosemary, thyme, or cinnamon
• Swap out a portion of the flour with alternative flours like whole wheat, rye, or cornmeal
• Experimenting with different flours can offer nutritional benefits and cater to various dietary preferences
Final Tips for Perfecting Your Flaky Pie Crust
When it comes to perfecting your flaky pie crust, one final tip to keep in mind is to always bake your pie on the bottom rack of the oven. This allows the bottom crust to crisp up nicely without risking the top crust becoming too dark or overcooked. Additionally, consider investing in a pie crust shield or simply tenting your pie with foil halfway through baking to prevent the edges from browning too quickly.
Another helpful tip for achieving an impeccably flaky pie crust is to brush the top crust with an egg wash before baking. This simple step not only adds a beautiful golden color to your pie but also helps seal in moisture, creating a crisp and shiny finish. Don’t forget to sprinkle a bit of sugar on top before baking for an extra touch of sweetness and crunch.
• Always bake your pie on the bottom rack of the oven
• Invest in a pie crust shield or tent with foil to prevent edges from browning too quickly
• Brush the top crust with an egg wash before baking
• Sprinkle sugar on top for extra sweetness and crunch